Rustic No Knead Bread
3 cups all purpose flour
1/4 teaspoon yeast
1 teaspoon salt
1 1/2 cup warm water
- Mix yeast and salt well with the flour
- Stir in the water and stir mixture until all is just incorporated. Do not over mix. Do not knead.
- Cover with saran wrap.
- Let sit 12 to 20 hours on the counter. Can sit as few as 5 hours, however the longer it sits the more flavorful it becomes so be patient! ( I often do this the night before at bedtime and bake in the morning)
It will nearly triple in size and look like this. ( and smell amazing)
- Prepare cast iron dutch oven or ceramic dutch oven with oil.
- Pick up bowl with dough in it ( uncovered) , wet your free hand with cool water, ( I just do this step by the sink and have the water run), gently pull dough so it falls into dutch oven. Wet hand often to keep from sticking. Do not add flour. Do not knead. It will look like a wet mess. That's okay!
Very wet and sticky. Resist the urge to fix it!
- Cover dutch oven with saran wrap and let rest for 2 hours. If your home is on the cool side put it in a warm spot.
- After the rest period, fold the dough ( with wet hands, NO flour, I promise you will be amazed at how easy it is with the water) onto itself four to six times. Loosely shaping the loaf. Do not pick the dough up. Simply rotate your pot as you fold. Do not over fold or punch the dough down.
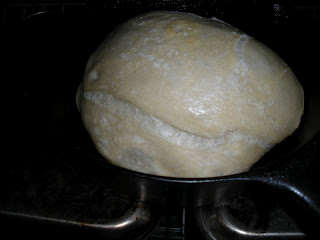
The dough will nearly fill the dutch oven.
This is after the folding. Still a wet and sloppy dough. Do not add flour!!!!
- Put cover on Dutch Oven and place in oven for 30 minutes.
I do not have a lid for my old cast iron dutch oven. Two layers of foil sealed tightly works just fine.
- Then remove the lid and cook for 15 to 20 more minutes. This step depends on your taste. Some like the crust dark almost burnt looking. We tend to like ours somewhere between dark and light.. so experiment!
This is at the 30 minute mark.
- Remove from Dutch Oven to a cooling rack.
This is the hue we like. The crust will be crunchy. The inside nice and soft with lovely texture.
This is great warm, makes great toast, and awesome sandwich bread. Best if stored in a paper bag. After 2 days ( although I am quite sure there won't be any) put it in the fridge.
Nutrition Information based on: Calorie Count
Calories per slice: 86
Cholesterol 0
Sodium 148 mg
Protein 2.4 gr
Carbohydrates 17.9 gr
Fiber 0.6 gr


YUM!!!! I love bread (too much, ha) I saw a recipe similar to this on pinterest and have been wanting to try. I do not have a bread machine...may look into one when I have a house...the RV does not need more appliances, ha
ReplyDeleteThat seems simple enough.....will have to try.